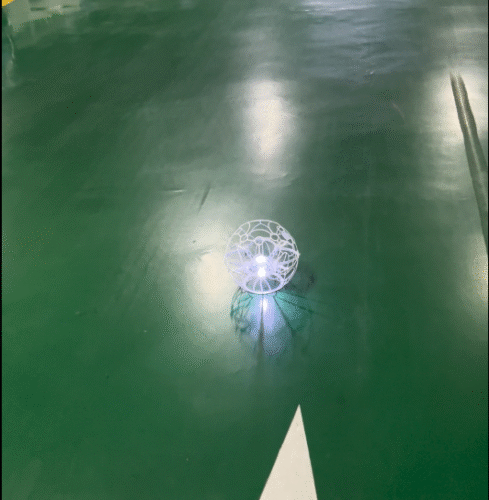
Soccer Drone Rectangular Flight Path: Beginner’s Practical Guide
After mastering straight flight, soccer drone beginners will advance to practicing rectangular flight paths—but the most common problem arises: many people always turn the right angles of the rectangle into arcs when practicing, or the path is crooked, or they lose control at the corners, and some even forget to close the flight path halfway. In fact, the core of a rectangular flight path is not “drawing a shape”, but practicing control. In this lesson, we will thoroughly explain the practical points, corner skills and common mistakes of rectangular flight paths, helping you fly every side and every corner smoothly and stably.
Rectangular flight path is an advanced training of straight flight, focusing on exercising beginners’ throttle stability, joystick accuracy and spatial awareness. It is also the foundation for more complex trajectory flights such as the subsequent “figure-eight flight path”. This lesson will break down step-by-step practical methods, correct frequent mistakes of beginners, and let you easily master the flying skills of rectangular flight paths.
1. Clarify the Goal of Rectangular Flight Path: Fly an “Angular Path” Along the Four Vertices
The coach explains to the students: A rectangular flight path is not drawing a circle, nor is it flying a quadrilateral randomly. The core is to fly a regular path with “four right-angle turns”. Each side is a straight line, and each corner is clear and neat, without dragging.
Rectangular flight path mainly trains students in three core abilities:
- Stability of the left-hand throttle (maintaining consistent height throughout the flight)
- Accuracy of the right-hand joystick (straight line walking and corner fine-tuning)
- Spatial awareness (judging the positional relationship between the drone and the reference point)
Tell the students: Mastering the rectangular flight path solidly can not only improve the control proficiency, but also lay a solid foundation for more complex flight trajectories in the future.
2. Set Up Ground Reference Points to Make the Rectangular Shape Clearly Visible
To make the flight trajectory clear to the students, the coach needs to place clear reference points on the ground as follows:
- A takeoff/landing point as the starting point of the flight (marked with a circle, consistent with the previous lessons)
- Place 4 reference points directly in front of the takeoff/landing point to form a regular square (or rectangle)
The coach explains to the students: These 4 reference points are the four vertices of the rectangle. When the drone is flying, it needs to fly from one vertex to another. Only by flying along the vertices can a standard rectangular flight path be formed, avoiding shape distortion caused by flying by feeling.
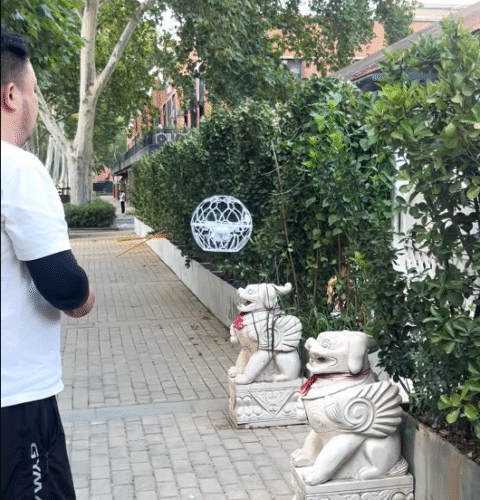
3. Take Off in Tail-In Orientation and Stabilize at Knee Height
Consistent with the requirements of the previous lessons, the tail of the drone must always face the student, and the flight must be maintained in a tail-in perspective throughout, which is the foundation for the stability and safety of the rectangular flight path.
The coach emphasizes:
- After takeoff, hover for 1 second first, and start flying only after the drone is completely stable
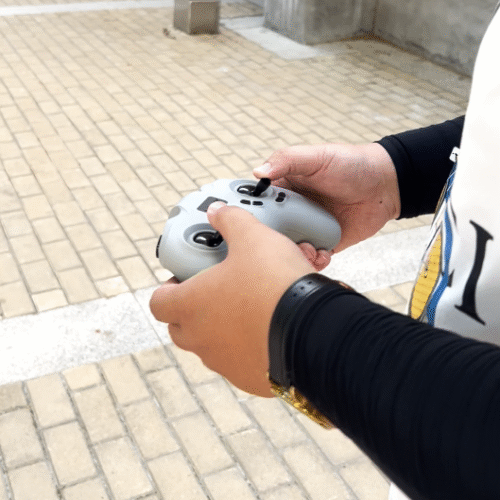
- Maintain knee height throughout the flight, with the left hand controlling the throttle, and no fluctuations in height are allowed
- During the flight, the tail of the drone always faces itself, and no rotation is allowed
Special emphasis: The rectangular flight path does not require turning the nose. The entire flight process is completed from a tail-in perspective to avoid direction confusion and loss of control caused by turning the nose.
4. Fly Forward from the Takeoff/Landing Point to the End of the Lower Side of the Square, Keeping the Path Straight
The coach demonstrates and explains the first step of the operation:
- Start from the takeoff/landing point and fly straight forward (consistent with the straight flight skills in Lesson 4)
- Accurately fly to the reference point directly in front (the end of the lower side of the square)
- After arriving, hover for 1 second to ensure the drone is stable; if it is not flying accurately, you can fine-tune the position slightly before proceeding to the next step
Emphasis: Students must stabilize the drone directly above the reference point (vertex). They must not fly past the point or fail to reach the target point, which is the key to ensuring the regularity of the rectangle.
5. Fly Straight to the First Corner from the Midpoint of the Lower Side of the Rectangle (to the Right or Left) to Form the First Side
The coach explains and demonstrates the flying skills of the first horizontal side:
- Keep the tail-in orientation unchanged and gently push the right joystick to the right (or left)
- Control the drone to move horizontally and accurately fly to the reference point of the first corner
- After reaching the target point, hover for another 1 second to stabilize the drone’s state and prepare for flying the next side
Remind the students: This horizontal side is exactly the same as the left and right straight flight practiced in the previous lesson. It is necessary to keep the path straight, without skewness or drift.
6. Fly Straight from the First Corner to the Second Corner to Complete the Second Side
The coach demonstrates and explains the flying of the second vertical side:
- Keep the tail-in orientation and gently push the right joystick forward to make the drone fly straight forward
- Accurately fly to the reference point of the second corner directly in front
- After arriving, hover for 1 second to ensure the drone is stable, without shaking or deviation
Let the students understand: Whether flying forward or backward, as long as it is a side of the rectangle, the path must be as straight as “pulling a rope”, and no bending or deviation is allowed.
7. Fly Straight to the Third Corner from the Second Corner (to the Left or Right) to Complete the Third Side
The coach demonstrates the flying of the third horizontal side, with the same steps as the fifth step:
- Keep the tail-in orientation, fly straight horizontally, and accurately fly to the reference point of the third corner
- After arriving, hover for 1 second to stabilize the drone and avoid loss of control due to hasty operation
Remind the students: During horizontal flight, the left hand should always maintain stable height, and the right hand should fine-tune the path to ensure the drone moves horizontally without fluctuations in height or deviation.
8. Fly Straight Backward from the Third Corner to the Fourth Corner to Close the Entire Rectangle
The coach demonstrates the flying of the fourth side, which is also the closing step of the rectangular flight path:
- Keep the tail-in orientation and gently pull the right joystick backward to make the drone fly straight backward
- Accurately fly backward to above the reference point of the fourth corner (i.e., the starting takeoff/landing point)
- After arriving, hover for 1 second to complete the closing of the entire rectangular flight path
Emphasis: When flying backward, the path must also be kept straight, and the speed should be slow to avoid flying past the point due to hasty operation and failing to close the flight path accurately.
9. Students Fly One by One, and the Coach Focuses on Correcting Common Mistakes
Students perform real-drone operations one by one, and the coach patrols the scene to timely correct common mistakes of beginners with commands. The specific mistakes and correction methods are as follows:
- Turning corners into arcs → Command correction: “Stop steadily at the point first, then turn! Don’t worry, take it step by step”
- Crooked flight path or side drift → Command correction: “Align the path with the reference point, fine-tune with the right hand, and don’t drift sideways!”
- Fluctuating flight height → Command correction: “Be gentle with the left hand, stabilize the throttle, and keep the height consistent!”
- Flying too fast, leading to overshooting the point → Command correction: “Push the joystick gently. Rectangular flight trains control, not speed!”
- Forgetting to return to the starting point and failing to close the flight path → Command correction: “The rectangle must be closed. After flying to the last point, you must return to the starting point!”
Emphasize to the students: Rectangular flight path is a kind of “control ability” training. The core is accuracy and stability, not speed. It is more important to fly slowly and steadily than to fly fast.
10. Lead Students in Complete Command Practice (Whole Class Synchronously)
To strengthen students’ understanding of the rectangular flight path trajectory, the coach leads the whole class to conduct synchronous command simulation practice (which can be combined with remote control simulation operation):
- “Take off and go to the first corner!”
- “Fly straight to the right (or left) to the second corner!”
- “Fly straight forward to the third corner!”
- “Fly straight to the left (or right) back to the starting point to close the flight path!”
Through command simulation, students strengthen their memory of the flight path shape and operation steps; after proficiently practicing in the clockwise direction, they can switch to the counterclockwise direction to improve control flexibility.
11. Summarize the Key Points of the Course and Lay the Foundation for the Next Lesson “Figure-Eight Flight Path”
After the lesson, the coach summarizes the core key points of this lesson to the students:
The core of the rectangular flight path is the combination of “straight lines + corners”. It focuses on practicing the stability of the left-hand throttle, the accuracy of the right-hand joystick, and the habit of “stopping steadily before flying” at the corners. Each side must be straight, and each corner must be neat—this is the key to the rectangular flight path.
At the same time, lay the foundation for the next lesson: In the next lesson, we will practice the “figure-eight flight path”, which is a further challenge to the continuous control of the trajectory. Compared with the right-angle corners of the rectangular flight path, the figure-eight flight path requires maintaining smooth curves and consistent rhythm. Tell the students: As long as the rectangular flight path is mastered solidly, learning the figure-eight flight path will be easier and smoother in the future.